Cutting
1. What is a 'Cut' and 'Trim'?
It is just a term we use to describe for the way we cut parts off a runner. It means we cut the parts off the runner with a little allowance, leaving behind a little nub on the part. We then trim of the nub down with the side cutter (Place the flat edge of the side cutter flush with the part to trim).
2. Why should I bother to use the 'Cut' and 'Trim'?
It is not necessary to do it in two steps. We recommend this method, because some parts are attached to the runner in a awkward position, which does not allow you to get a clean cut. Sometimes, you may overcut into the part and leaving behind a nasty hole.
Question 3 - 5 applies mainly to modelers who do not intend to paint their models.
3. I used a good side cutter, when I trim the nub it still leaves behind a white mark. How can I prevent that?
Most people would experience this, especially when cutting darker colour plastic which are usually made from ABS plastic. The white mark is a stress mark caused by the bending of plastic as you cut. You can reduce the stress on the plastic, you can try trimming the edges of the nub, instead of cutting across it. Smaller cuts reduces the stress on the plastic and remove the remaining nub with a sharp modeling knife.
4. I tried the method you describe in step 3, but there are still stress marks?
There are several ways to remove the stress mark. Firstly, you can try touching up the stress mark by using a Gundam marker of the same or similar color. Secondly, you can try to melt the plastic with Tamiya Extra Thin Cement (for Polystyrene PS parts) or Mr Cement S ( for ABS parts). As the plastic melts, it returns to its original colour. Leave the plastic to harden for a day before sanding. Exercise caution when apply cement as it cause your plastic to melt, excessive cement could cause undesirable effects.
5. I used the cement to remove the stress mark, but when I sand, I discovered that it made a hole. I do not intend to paint, so I can't fill the hole with putty. What can I do?
You can try shaving some plastic off the runner with the same colour as the part. Place the shaving in the hole and melt it with cement. Repeat the procedure till the hole is completely filled with a little excess. Wait for the plastic to harden before sanding.
6. How do I know if the plastic has harden?
When you are sanding and the plastic coming off is sticky, it means that the plastic has not completely harden. When you sand, it should be dry and powdery.
Sanding Updated on 7/1/2012
1. Why kind of sand paper should I use for sanding my Gundam model kit?
Hobby Sandpapers are always recommended, because the are designed and tested for plastic. If you still wish to use commercial sandpapers, please be careful in selecting the right types for plastic. Using the wrong kind of sandpaper can cause deep scratches on your plastic parts which are quite difficult to remove.
2. What are the numbers printed on the sandpaper?
They represent the grit of the sandpapers. There are many grit of sandpapers, ranging from 180 to 2000 or beyond. The bigger the number, the finer the sandpaper.
3. What grit of sandpaper should I use?
Generally sanding of plastic is done with sandpapers between 400 and 1000 Grits. We start with 400 grit to remove the nub and move up to 600 grit to reduce the scratches 400 grit and finish with 1000 grit.
4. So what are the other grits used for?
The lower grits like 180-320 are used to sand harder materials like superglue or epoxy putty. Higher grits like 1200-2000 are use to achieve super fine finishes (especially for gloss finishes, like car model kits)
5. I am using 400 grit hobby sandpapers to sand my model kit. Why is it I am still getting deep scratches?
Tip for preventing deep scratches from forming, use less force when sanding especially when using a new piece of sandpaper. Sand lightly over a larger surface, do not focus only on the nub. Sand with a circular motion.
6. Why is it that the part I am sanding is sticky?
Generally, it means that your cemented parts or puttied parts have not completely cured. Please try to sand in another couple of hours.
7. Should I use a file, it's definitely faster than sandpaper?
It is personal preference, unless you can control the use of a file, you will tend to leave behind very deep scratches. Only use files when you need to remove super glue or epoxy putty quickly and probably have to follow up with 180 - 320 grit to remove the deep scratches.
FAQ to be continued...

Showing posts with label Basic Gundam Modeling. Show all posts
Showing posts with label Basic Gundam Modeling. Show all posts
Friday, 6 January 2012

Thursday, 5 January 2012
Top Coat related Questions
1. What are Top Coats?
Top Coats are transparent coating which is applied on model kit to protect the paint or to prevent you plastic from changing colours?2. What the the top coats available?
Most of the Top Coat we use are from Mr HobbyAcrylic (Water Based Top Coat), we do not carry these products
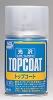
Gloss Finishing
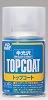
Semi Gloss Finishing
Flat/Matt Finishing
Lacquer Based Top Coat
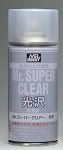
Gloss Finishing
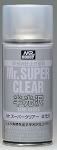
Semi Gloss Finishing
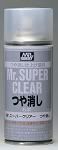
Flat/Matt Finishing
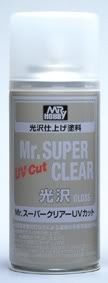
Gloss Finishing (with UV Reduction)
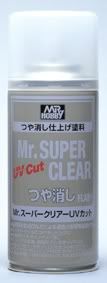
Flat/Matt Finishing (With UV Reduction)
Top Coat Applied by Airbrushing
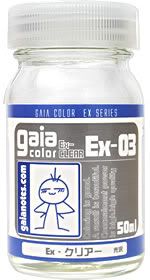
* Gloss Finishing
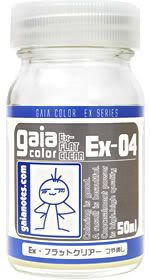
* Flat/Matt Finishing
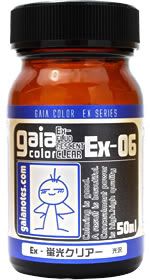
* Gloss Finishing / Fluorescent
3. What is the difference between the different finishing?
Gloss finishing is highly reflective and shining and Flat/Matt finishing is total unreflective. Semi-Gloss is between the two extremes.4. Which finishing should I use?
The most commonly used finish is Flat/Matt, but it is a personal preference. 5. What should I know about applying Top Coat(Can Spray)?
Flat Top Coat should be applied on a sunny day and in a open area. Shake well for 3 - 5 minutes before use. Apply thin layers in a single direction.6. Why can't I apply my Top Coat at night or a humid day?
There is a high risk of getting 'frosting' (white patches) when applying Flat Top Coat, which can be apparent when applied on a dark colored parts. The frosting may be caused by the cold air produced by the propellant reacting with the moisture in the air. The effect of frosting may not be as apparent when using Gloss Top Coat, but the finishing may not be as glossy as desired.7. I can only work on my models at night. Is there any solution to 'frosting'?
It is not a guaranteed solution, but ** heat up the spray can using hot water (40-60 degree celsius) before use can reduce the amount of 'frosting' or alternatively you can use airbrush to apply the Top Coat.** Please exercise caution when heating up the canister, it is pressured and may explode when heat for extended period of time or heated to extremely hot water.
8. I painted my model kit using acrylic paint, will the lacquer based Top Coat dissolve my paints?
Let the acrylic paint dry and cure completely for a few days before applying the lacquer base top coat and apply only thin layers.9. Should I apply the Top Coat before or after panel lining?
Depending on the situation. Generally, Top coats are only applied after panel lining for several reasons. Firstly, it helps seal the panel line ink and secondly, excess panel lines paint cannot be cleaned properly if a Flat Top coat (Flat coat produces a rough surface) is applied before panel-lining.10. Should I apply a layer of Gloss Top Coat before panel-lining?
Some online sites suggest the use of gloss top coat before panel-lining. Generally, we do not apply the Gloss Top Coat, unless you were using *** acrylic paints or you paint finish is **** rough.*** Acrylic thinner is the weakest of all the Hobby paints, it may be dissolved by Enamel and Lacquer Thinner. It would be advisable to seal the paint with a lacquer Gloss Top Coat before applying panel lines using enamel paints(eg. Tamiya Enamel paints or Tamiya Panel Line Accent).
**** A rough paint surface may make the cleaning of excess enamel paint a pretty messy affair. It is has the same effect as spray a layer of Flat Top Coat.
11. Could I use acrylic Top Coat on Lacquer paint? (Wilson)
It should not be a problem to apply acrylic Top Coat on lacquer paint.
Basic Modeling Tools
One of the most common question asked is what are the basic modeling tools that I need to build my model?
Depending on what level of finish you hope to achieve with each model:
1. If you do not intend to paint your model kit, all you really need are
a. Decent sidecutter (Side cutter from Hardware stores are not recommended)
b. Pen knife or Modeling knife (Personal preference)
c. Sandpaper (400, 600 and 1000 grit is normally enough, commercial sandpapers are not recommended)
d. Gundam Panel line markers (comes in black, gray and brown) or Tamiya Panel Line Accent (comes in the same colours as the markers) + Tamiya x-20 Enamel Thinner.
e. Mr Super Clear Top coat (most commonly used is Flat finish).
2. If you intend to paint your model kit but do not own a airbrush/compressor set, you will also need :
a. Primer / Base coat
b. Can spray paint (Limited colours available, costly and not able to do shading effects)
3. If you intend to paint your model kit and own a airbrush, you will need :
a. Paints
b. Paint Thinner (Not commercial thinner, most of the commercial thinners may melt you plastic when excessive amounts are present)
Depending on what level of finish you hope to achieve with each model:
1. If you do not intend to paint your model kit, all you really need are
a. Decent sidecutter (Side cutter from Hardware stores are not recommended)
b. Pen knife or Modeling knife (Personal preference)
c. Sandpaper (400, 600 and 1000 grit is normally enough, commercial sandpapers are not recommended)
d. Gundam Panel line markers (comes in black, gray and brown) or Tamiya Panel Line Accent (comes in the same colours as the markers) + Tamiya x-20 Enamel Thinner.
e. Mr Super Clear Top coat (most commonly used is Flat finish).
2. If you intend to paint your model kit but do not own a airbrush/compressor set, you will also need :
a. Primer / Base coat
b. Can spray paint (Limited colours available, costly and not able to do shading effects)
3. If you intend to paint your model kit and own a airbrush, you will need :
a. Paints
b. Paint Thinner (Not commercial thinner, most of the commercial thinners may melt you plastic when excessive amounts are present)
Subscribe to:
Posts (Atom)